When your truck cab turns cold and the seat stays cold with it, the Chevy Silverado heated seat switch is the first component worth inspecting.
A failed or intermittent switch accounts for a large share of heated seat complaints on Silverado trucks, yet many owners replace expensive heating elements before confirming the switch is healthy.
This 2026 guide covers how the switch circuit operates, how to distinguish switch failure from element or BCM failure, and exactly what to do when replacement is the right call.
How the Chevy Silverado Heated Seat Switch Works
The factory Silverado heated seat switch is a low-current rocker that either routes moderate current to the heater relay (older GMT800 and early GMT900 trucks) or sends a milliamp-level logic signal to the Body Control Module on 2014-and-later K2XX and T1XX platforms.
The BCM then energizes the relay and controls the heating mat circuit independently of the switch contacts. This architecture significantly extends switch service life because full heater current no longer flows through the rocker itself.
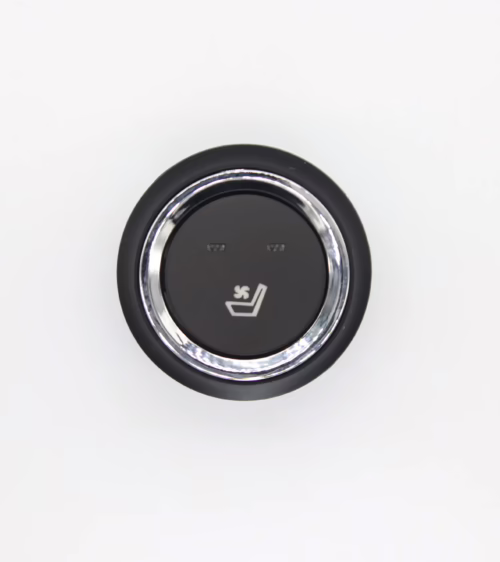
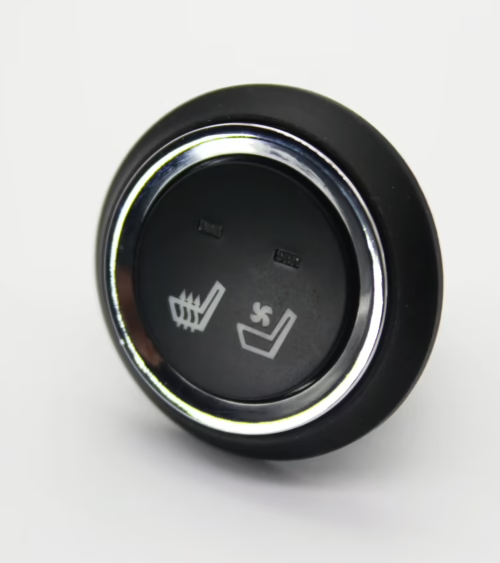
Most trim levels use a two- or three-position switch (Off, Low, High) with an embedded LED that illuminates when the heater is active.
That LED draws from a separate interior-lighting circuit, so a dark indicator does not always mean the heating circuit has failed — the LED driver can burn out while the heat function remains intact.
Inside the seat, a carbon-fiber or alloy resistive mat converts electrical energy into heat. Joule heating describes this conversion:
- current passing through a conductor with measurable resistance produces thermal energy proportional to the square of the current. A thermistor embedded in the seat foam feeds temperature data back to the BCM
- which cuts relay power if the surface approaches the calibrated ceiling — typically near 107°F (42°C) — protecting both occupants and the element from thermal damage.
Common Symptoms of a Failed Heated Seat Switch
The following symptoms point specifically to the switch rather than a downstream element or wiring problem:
- No heat on any setting with no LED illumination: The switch is not completing the control circuit at all, or the switch’s internal LED circuit has failed alongside the contacts.
- Heat works on Low but not High (or vice versa): Each heat level uses a separate contact inside the rocker. Partial failure of one contact produces this split-function symptom and is almost always a switch-level fault.
- Intermittent operation that responds to tapping the switch: Worn contact leaves or a failing solder joint inside the switch assembly cause the circuit to drop intermittently. Mechanical vibration temporarily restores contact, confirming the switch is the source.
- LED on but no heat produced: The switch is signaling the BCM correctly but the BCM, relay, or element is not completing the circuit. This symptom redirects suspicion away from the switch.
- Switch feels loose, gritty, or lacks a definite click: Physical damage to the mounting clips or worn detent mechanism causes inconsistent electrical contact with each press.
Diagnosing the Switch vs. the Heater Element
Confirming the switch is the failed part before ordering a replacement saves time and avoids installing a new switch into a circuit that will damage it immediately.
Check the fuse first. The seat heater circuit uses a dedicated 20A or 25A mini-blade fuse labeled SHT or HTD SEAT in the underhood or instrument-panel fuse block. A blown fuse almost always signals an element short to ground, not a switch failure.
Replace it and observe whether it blows again under load.
Measure switch output voltage. With the ignition on and the switch pressed to High, probe the switch output terminal at the connector with a digital multimeter. A healthy switch passes battery voltage (12–14V) on the signal wire.
No voltage with a good fuse and intact wiring confirms the switch has failed.
Test heater element resistance. Disconnect the harness under the seat and measure resistance across the element terminals. A single-zone mat typically reads 2–6 ohms. An open circuit reading (OL) means the element wire has broken; a near-zero reading indicates insulation failure and a short to ground.
Either result means the element needs replacement, not the switch.
Scan for BCM diagnostic trouble codes. On 2014-and-later Silverados, a scan tool with GM-enhanced coverage may return B1317 (Seat Heater Switch Circuit High) or B1318 (Circuit Low), identifying the switch or its signal wire as the fault source before any disassembly.
OEM vs. Aftermarket Switch Options
Once the switch is confirmed faulty, two sourcing paths exist.
Genuine GM (OEM): Dealer-sourced switches carry the original part number and plug directly into the existing harness without modification. They are manufactured to the original contact current rating and LED specification.
The tradeoff is cost — genuine GM rocker assemblies typically run $65–$120 depending on trim level — and occasional availability delays for older model years.
Quality aftermarket:
- OEM-specification aftermarket switches are available at significantly lower cost and typically ship faster. The factors that separate a reliable aftermarket switch from a short-lived one are contact current rating (must meet or exceed factory spec)
- housing fitment to the console cutout
- LED driver quality. Avoid unbranded switches that do not publish electrical specifications. You can find application-verified options in our replacement seat heater switch catalog
- organized by vehicle application and trim level.
Step-by-Step Switch Replacement on a Silverado
This is a straightforward DIY job on most Silverado generations, requiring only basic trim tools and a multimeter.
- Disconnect the negative battery terminal and wait 90 seconds. This prevents accidental BCM writes and protects the airbag system during electrical work.
- Remove the center console upper trim panel. Use a plastic trim removal tool to pry from the rear edge — most Silverado console panels release with upward pressure on four hidden friction clips. Avoid metal tools near the panel face to prevent scratching.
- Unplug the switch connector. Press the locking tab fully before pulling straight back. On high-mileage trucks the tab can be stiff; use a small flathead to depress it completely rather than forcing the connector body.
- Release the switch from the panel. Side clips secure the rocker in the panel cutout. Squeeze both clips simultaneously with needle-nose pliers and push the switch through the front face of the panel.
- Install the replacement switch. Press it into the cutout until both side clips click audibly. Reconnect the keyed harness connector — it only seats in the correct orientation.
- Reinstall the trim panel and reconnect the battery. Test both heat levels and confirm LED illumination on each setting before fully snapping the console panel back into place.
Model Year Compatibility and Part Number Differences
Silverado heated seat switches are not interchangeable across all generations. The critical break points are:
- 1999–2006 (GMT800): Two-position rocker; switch routes current directly through contacts to the relay. Part numbers split between single-zone (driver only) and dual-zone configurations.
- 2007–2013 (GMT900): Three-position illuminated switch introduced on LT and LTZ trims. Connector pitch changed between 2007 and 2008 — verify the connector style, not just the model year, before ordering.
- 2014–2018 (K2XX): BCM-signal architecture replaces direct-current switching. Full heater current no longer passes through the switch contacts. Dual-zone trims use a 6-pin connector housing.
- 2019–2026 (T1XX): Retains BCM-signal architecture with updated connector housings. High Country and LTZ trims equipped with the infotainment climate package control heated seats through the touchscreen, bypassing the console rocker entirely.
Always cross-reference by VIN and trim code (WT, Custom, LT, RST, LTZ, High Country).
The same model year can carry two distinct switch assemblies depending on whether the truck was ordered with the heated steering wheel package, which shares a harness zone with the seat heater circuit and affects connector pinout.
Preventing Premature Switch Failure
Switches that fail well before their rated actuation life usually have one of three causes. First, a degrading heater element draws higher inrush current on cold starts, arcing the switch contacts over time.
Always measure element resistance as part of any switch replacement — installing a new switch into a system with a failing element shortens the replacement’s service life. Second, liquid spills corrode the internal contacts.
If the console gets wet, remove the switch promptly and treat the contacts with electrical contact cleaner before corrosion becomes permanent. Third, forcing a mechanically stuck switch cracks the internal PCB or bends the contact leaf springs. A gritty or stiff switch should be cleaned before pressure is applied.
If you want to compare switch specifications, heater mat kits, and control modules in one place, browse our complete seat heating product lineup to find the right components for your Silverado’s trim and model year.
Frequently Asked Questions
Can I use a GMC Sierra heated seat switch in my Chevy Silverado?
In most cases, yes. The GMT800, GMT900, K2XX, and T1XX platforms are shared between Silverado and Sierra, and the heated seat switch assemblies frequently carry identical GM part numbers.
Confirm by matching part numbers directly rather than relying on trim-level descriptions, since interior color and panel finish can differ between brands even when the electrical switch is the same component.
My Silverado has dual heated seats but only the driver side stopped working. Do I need to replace both switches?
No. Driver and passenger seat heater switches fail independently based on how much each is used. Replace only the failed unit.
If the passenger switch shows intermittent symptoms within the next few months, address it then — proactive replacement at that point is reasonable, but replacing a fully functional switch alongside a failed one is unnecessary.
The new switch heats the seat but the LED does not light up. What should I check?
First confirm the replacement switch’s LED is rated for 12V and that the illumination pin in the connector is present and intact — some economy-grade aftermarket switches omit the LED driver circuit to reduce manufacturing cost.
If the circuit is present and the light still does not work, check the interior illumination fuse and the dimmer roller on the headlight switch, since most Silverado trims tie the switch backlight to the general interior lighting circuit rather than a dedicated seat heater fuse.
Lucky Driver Inc. supplies seat heater switches, heating mats, and control modules to professional installers and truck owners throughout North America. Every component is tested to OEM electrical specifications. Contact Lucky Driver Inc.
to confirm the correct switch for your Silverado trim and model year before you order — our team can cross-reference by VIN to eliminate compatibility guesswork.
Related Articles
- Ford Escape Heated Seat Switch: 2026 Complete Repair Guide
- The Lucky Driver’s 7-Point Guide to Seat Heater Systems in 2026
- Ford Explorer Seat Heater Switch: 2026 Complete Repair Guide
- Ford F150 Heated Seat Switch: 2026 Complete Repair Guide
- Honda Pilot Heated Seat Switch: 2026 Complete Repair Guide
Frequently Asked Questions About chevy silverado heated seat switch
Procurement engineers evaluating chevy silverado heated seat switch for OEM programs regularly ask the following questions. Answers cover specification, compatibility, certification, and sourcing for chevy silverado heated seat switch requirements.
What voltage ratings are available for chevy silverado heated seat switch?
Standard chevy silverado heated seat switch configurations support 12 V DC for passenger vehicles and 24 V DC for commercial trucks. Selecting the correct chevy silverado heated seat switch voltage at the design stage eliminates harness rework later.
Lucky Driver maintains chevy silverado heated seat switch inventory in both ratings for same-week shipment.
Which certifications apply to chevy silverado heated seat switch production?
chevy silverado heated seat switch assemblies entering OEM programs typically require UL recognition, REACH compliance, and RoHS documentation. Lucky Driver holds certification records for every chevy silverado heated seat switch variant and includes copies with sample and production shipments.
How is watt density specified for chevy silverado heated seat switch?
Watt density for chevy silverado heated seat switch is expressed in W/cm² and ranges from 0.04 to 0.12 depending on heat-up time requirements. Lower watt density chevy silverado heated seat switch designs improve element longevity, while higher values suit cold-climate applications.
Lucky Driver engineering reviews chevy silverado heated seat switch requirements and recommends watt density based on your seat platform.
What connector families are used with chevy silverado heated seat switch?
chevy silverado heated seat switch harnesses are available with Molex, TE Connectivity, and Delphi connector families. Matching the chevy silverado heated seat switch connector to the vehicle harness reduces assembly time and eliminates adapter cables.
Specify your harness format when requesting a chevy silverado heated seat switch quote from Lucky Driver.
What is the lead time for chevy silverado heated seat switch samples?
chevy silverado heated seat switch samples from Lucky Driver’s North American warehouse ship within 3 to 5 business days for standard configurations. Custom chevy silverado heated seat switch variants with modified pad geometry or connector pinouts require 4 to 6 weeks.
Contact Lucky Driver to confirm chevy silverado heated seat switch availability before submitting your engineering schedule.