The honda pilot heated seat switch is a small but critical component that controls the signal circuit activating the seat’s resistive heating mats. When it fails—whether from worn contacts, a cracked housing, or a faulty backlight LED—you lose one of the most-used comfort features on cold-weather drives.
This guide covers how the switch circuit works, how to confirm the switch is actually the problem, and how to replace it on 2003–2024 Honda Pilot models without unnecessary guesswork or parts chasing.
How the Honda Pilot Heated Seat System Works
Honda Pilot seats use a resistive heating mat—either a carbon-fiber film or nichrome wire element—laminated into the seat cushion and seatback foam.
Pressing the heated seat switch sends a signal through the body control module (BCM) or a standalone seat heater module, which then energizes a relay that routes 12V battery power directly to the heating element.
A negative temperature coefficient (NTC) thermistor embedded near the heating mat monitors surface temperature and feeds data back to the module so it can cycle the relay and hold the selected heat level without overheating the seat surface.
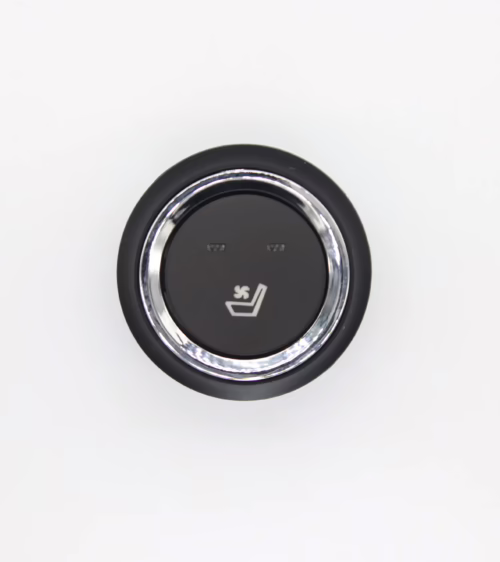
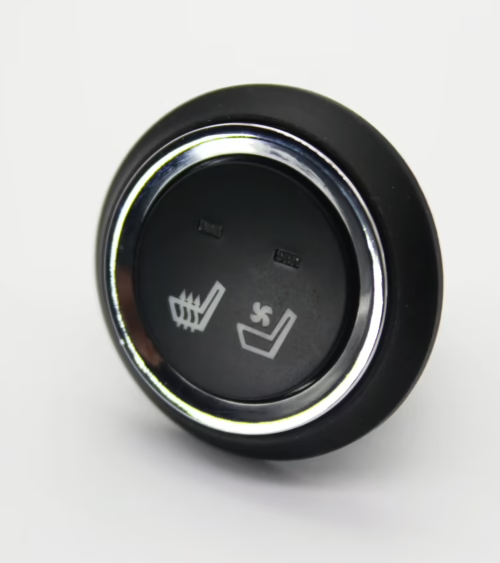
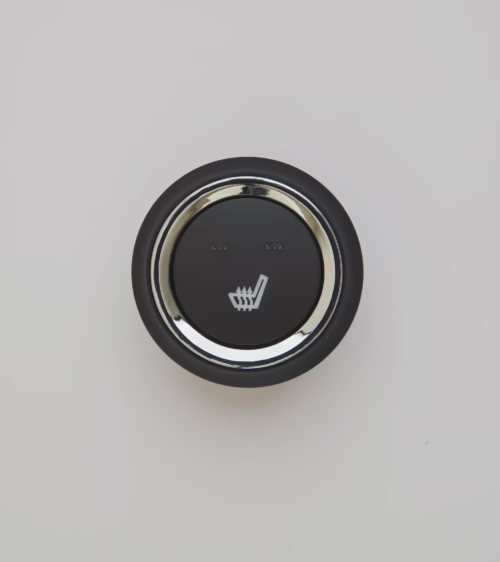
Third- and fourth-generation Pilots (2016–present) use an illuminated three-position rocker switch—off, low (one bar), and high (two bars)—mounted in the center console switchbank. Earlier 2003–2015 models use a two-position push-button or sliding switch depending on trim level.
In all generations the switch assembly contains a backlight LED, a set of copper rocker contacts, and one or more signal wires running to the BCM or heater control unit. The switch itself draws very little current; it is a control signal device, not a power-switching device.
That distinction is essential when diagnosing a no-heat complaint, because a failed relay, blown fuse, or broken heating element produces identical symptoms.
Common Symptoms of a Failed Honda Pilot Heated Seat Switch
Not every heated seat problem points to the switch. Recognizing which symptoms are switch-specific saves time and prevents replacing the wrong part.
- No illumination and no heat: The LED backlight and the control contacts share the same power feed in most Pilot trims. If the switch is completely dark and produces no heat on either setting, the switch assembly is the most likely cause—provided the fuse is intact.
- Backlight works but no heat: The LED circuit and the contact circuit route through different pins. A burned contact inside the rocker can kill heat output while leaving the backlight alive.
- Heat only on one setting: If low heat works but high does not, or vice versa, one set of contacts inside the rocker is worn or corroded. This is a classic sign of mechanical contact failure within the switch body.
- Intermittent operation: Heat that cuts in and out when you press or wiggle the switch points to a cracked solder joint on the switch PCB or a spring contact that has lost tension over time.
- Switch feels mushy or no longer clicks: Physical detent failure will not always kill function immediately, but it signals that the switch mechanism is near end of life and replacement should be scheduled before total failure.
Heated Seat Switch Location Across Honda Pilot Generations
The switch location changed with each major redesign, which directly affects how involved the replacement job will be.
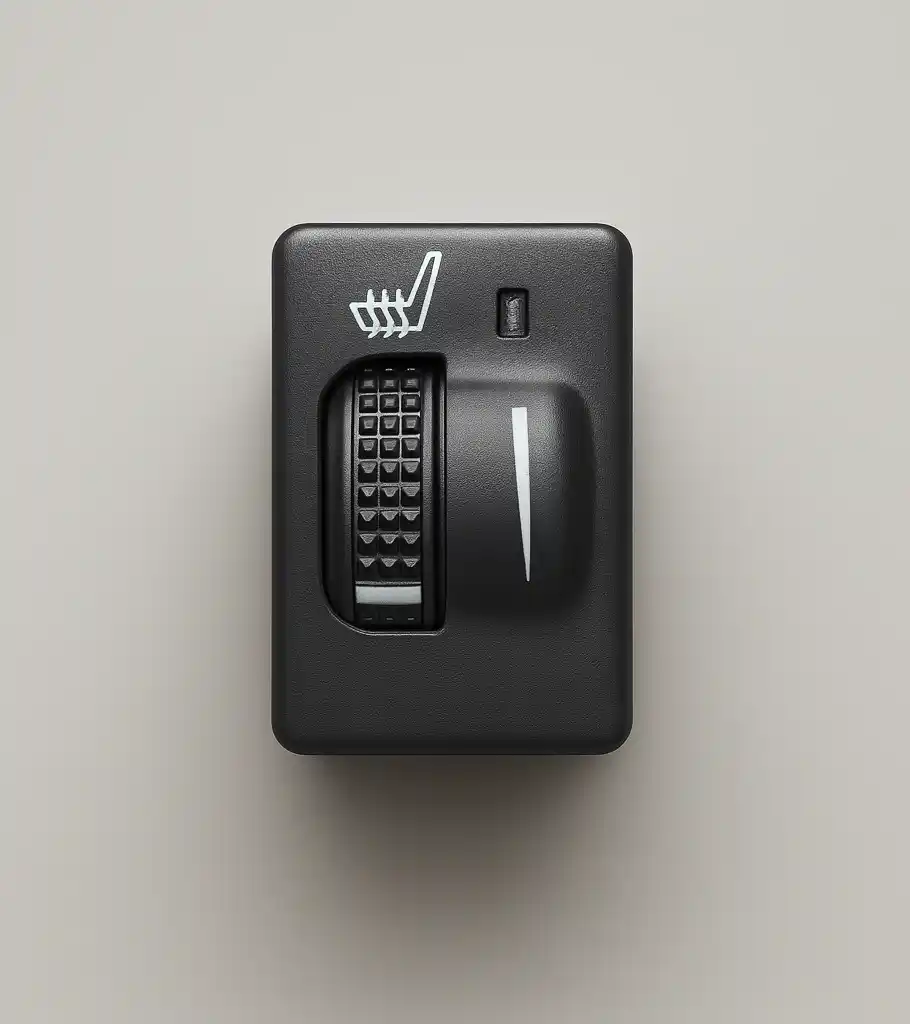
- 2003–2008 (1st Gen): Heated seat switches on EX-L trim are located on the outboard face of the center console, just forward of the armrest. They are two-position push buttons integrated into a panel that also houses rear climate controls.
- 2009–2015 (2nd Gen): Switches moved to the lower center console switchbank below the HVAC panel. They use a two-button layout with amber backlighting. Access requires unclipping a trim bezel—no screws in most cases.
- 2016–2022 (3rd Gen): Illuminated three-position rockers sit in the forward center console panel, adjacent to the rear seat heater switches on EX-L and Touring trims. This generation uses a snap-fit bezel removable with a plastic trim tool.
- 2023–2024 (4th Gen): The switchbank layout is similar to the 3rd Gen, but the center console uses a revised trim panel with integrated vents. On trims equipped with both heated and ventilated seats, the switch is a combination unit controlling both functions from a single assembly.
Passenger seat switches mirror the driver side location and, in most trim levels, use an identical part number—useful to know if you want to swap and test before ordering a replacement.
Diagnosing the Switch Before Ordering Parts
Replacing the switch first without testing is a common and expensive mistake. Run through this sequence to confirm the switch is at fault before placing an order.
- Check the fuse first: Locate the heated seat fuse in the under-dash fuse box—typically a 20A or 25A blade fuse labeled SEAT HTR or HTD SEAT. A blown fuse with no obvious cause usually indicates a short in the heating element, not the switch.
- Verify battery voltage at the switch connector: With the ignition on, use a multimeter to confirm 12V is present at the switch power pin. No voltage here points to the fuse, BCM output, or wiring harness—not the switch itself.
- Check switch output signal:
- Back-probe the signal wire at the switch connector. Actuating the switch should produce a measurable voltage change—typically 0V to 5V or 0V to 12V depending on whether the BCM uses a logic-level or battery-level input signal.
- If input voltage is present but output does not change with switch actuation
- the switch is confirmed defective.
- Test the heating element resistance: Disconnect the element connector under the seat cushion. A healthy nichrome element typically reads 2–6 ohms. An open circuit reading on the multimeter means the element wire is broken and no switch replacement will restore heat.
- Inspect the connector for corrosion: Pull the switch connector and look for green oxidation on the terminals or pushed-back pins. A corroded connector can cause identical symptoms to a failed switch and is corrected with electrical contact cleaner and a pin repair kit rather than a new switch.
How to Replace the Honda Pilot Heated Seat Switch
Once you have confirmed the switch is defective, the replacement takes 15 to 30 minutes on most Pilot generations with basic hand tools.
- Tools needed: Plastic trim removal tool, small flathead screwdriver, and a 10mm socket if any fasteners secure the console panel to the floor structure.
- Step 1 – Disconnect the battery negative terminal and wait two minutes to allow BCM capacitors to discharge before handling any interior electrical connectors.
- Step 2 – Remove the center console trim bezel. Insert a plastic pry tool at the lower edge of the switchbank bezel and work around the perimeter using light, even pressure. Most Pilot console panels use friction clips with no adhesive.
- On 3rd and 4th Gen models there may be one hidden screw under the armrest lid.
- Step 3 – Unplug the switch connector. Press the locking tab inward and pull the connector straight back. Do not twist; the terminals are keyed to prevent incorrect reinstallation.
- Step 4 – Release the switch from the panel. Most Honda switches use push-in locking tabs on two opposing sides of the switch body. Press both tabs inward simultaneously and push the switch body out through the front face of the panel.
- Step 5 – Install the replacement switch. Snap the new unit into the panel aperture until both locking tabs click audibly, reconnect the harness connector until it clicks, then reinstall the trim panel starting from the top edge.
- Step 6 – Reconnect the battery and test. Cycle the switch through both heat levels and confirm the backlight illuminates at each position and heat output is felt within 60 to 90 seconds.
Selecting a Quality Replacement Switch
Fit, contact material, and backlight compatibility are the three factors that determine whether a replacement switch delivers OEM-level durability.
OEM Honda switches—available by VIN lookup at any dealer parts counter—are guaranteed to match the BCM signal voltage specification and carry the correct backlight color:
- amber for 2nd Gen Pilots
- white-blue for 3rd and 4th Gen. OEM is the lowest-risk option when budget allows
- particularly on 2016–2022 models where the switch integrates directly into a multi-function panel that is expensive to replace if an ill-fitting aftermarket unit damages the housing clips.
Quality aftermarket switches are a practical alternative when OEM supply is constrained or the price difference is meaningful. Look for units that specify the correct number of positions (two or three depending on generation), a matching connector pin count, and a rated mechanical life of at least 50,000 actuation cycles.
Avoid generic universal switches that require wire splicing; the Honda BCM expects a keyed OEM-style connector and precise signal voltage. You can find Honda-compatible options in our seat heater switch catalog, sorted by vehicle application with OEM-spec connectors and backlight configurations noted.
If you are also dealing with reduced heating output after the switch replacement—warmth that feels weaker than factory—the heating element itself may have developed partial wire breaks that raised its resistance.
In that case, browse our full range of seat heating components, which includes replacement heating mats cut to Honda Pilot cushion and seatback dimensions, along with harness extensions and replacement relays.
Frequently Asked Questions
Can a bad heated seat switch damage the heating element?
In most cases, no. On 2009 and newer Pilots the switch is a signal-path device; it does not carry the full current load to the element. If the switch fails open, the BCM never activates the relay and the element receives no power.
If the switch fails with a shorted output signal, the BCM may run the element at maximum continuously, which can accelerate element aging over weeks of use but rarely causes immediate damage.
The more serious risk to the element is a relay stuck in the closed position, which bypasses the BCM’s thermal protection logic entirely.
Why does my heated seat work intermittently only when the car interior is cold?
Intermittent operation that resolves after the cabin warms up suggests a thermally sensitive failure—either a hairline crack in a solder joint on the switch PCB that closes as the plastic expands slightly with heat, or a corroded contact point that conducts better once moisture has evaporated.
Neither problem self-corrects permanently. Cleaning the connector pins with electrical contact cleaner and a lint-free swab is worth trying first. If the intermittent behavior returns within one week, replace the switch; the root cause is mechanical and will worsen with use.
Are the driver and passenger heated seat switches interchangeable on a Honda Pilot?
On most Pilot generations, yes. The front driver and passenger seat heater switches use identical part numbers, matching connector pinouts, and symmetric housings that install correctly in either position. This means you can swap the driver and passenger switches temporarily as a diagnostic step:
- if the problem follows the switch to the other seat
- the switch is bad
- if the problem stays on the original seat
- look at the wiring or heating element instead. Rear seat heater switches
- available on Touring and Elite trims
- use a smaller format and different connector and are not interchangeable with the front switches.
For heated seat issues that extend beyond the switch itself, Lucky Driver Inc. supplies complete seat heating solutions—including heating elements, wiring harnesses, control modules, and thermistor assemblies—designed for OEM seat manufacturers and professional aftermarket installers across North America.
Reach out to our technical team for application-specific guidance on your Pilot build year and trim level.
Related Articles
- Honda CR-V Seat Heater Switch: 2026 Complete Repair Guide
- Honda Accord Heated Seat Switch: 2026 Repair Guide
- Honda Civic Seat Heater Switch: 2026 Repair Guide
- Toyota Tundra Heated Seat Switch: 2026 Repair Guide
- Toyota 4Runner Seat Heater Switch: 2026 Repair Guide
Frequently Asked Questions About honda pilot heated seat switch
Procurement engineers evaluating honda pilot heated seat switch for OEM programs regularly ask the following questions. Answers cover specification, compatibility, certification, and sourcing for honda pilot heated seat switch requirements.
What voltage ratings are available for honda pilot heated seat switch?
Standard honda pilot heated seat switch configurations support 12 V DC for passenger vehicles and 24 V DC for commercial trucks. Selecting the correct honda pilot heated seat switch voltage at the design stage eliminates harness rework later.
Lucky Driver maintains honda pilot heated seat switch inventory in both ratings for same-week shipment.
Which certifications apply to honda pilot heated seat switch production?
honda pilot heated seat switch assemblies entering OEM programs typically require UL recognition, REACH compliance, and RoHS documentation. Lucky Driver holds certification records for every honda pilot heated seat switch variant and includes copies with sample and production shipments.
How is watt density specified for honda pilot heated seat switch?
Watt density for honda pilot heated seat switch is expressed in W/cm² and ranges from 0.04 to 0.12 depending on heat-up time requirements. Lower watt density honda pilot heated seat switch designs improve element longevity, while higher values suit cold-climate applications.
Lucky Driver engineering reviews honda pilot heated seat switch requirements and recommends watt density based on your seat platform.
What connector families are used with honda pilot heated seat switch?
honda pilot heated seat switch harnesses are available with Molex, TE Connectivity, and Delphi connector families. Matching the honda pilot heated seat switch connector to the vehicle harness reduces assembly time and eliminates adapter cables.
Specify your harness format when requesting a honda pilot heated seat switch quote from Lucky Driver.
What is the lead time for honda pilot heated seat switch samples?
honda pilot heated seat switch samples from Lucky Driver’s North American warehouse ship within 3 to 5 business days for standard configurations. Custom honda pilot heated seat switch variants with modified pad geometry or connector pinouts require 4 to 6 weeks.
Contact Lucky Driver to confirm honda pilot heated seat switch availability before submitting your engineering schedule.