What Is the Ventilated Seats Button and How Does It Work?
The ventilated seats button is the dashboard or seat-mounted control that activates forced-air circulation through perforations in your seat cushion and backrest. When you press it, the system routes power to a brushless blower motor positioned beneath the seat foam.
That motor draws cabin air through a plenum, passes it through a distribution layer of open-cell foam or a rigid duct, and exhausts it upward through micro-perforations in the seat cover—typically 0.8 mm to 1.5 mm in diameter on OEM leather surfaces.
The result is evaporative cooling of the occupant’s contact surface, reducing perceived temperature by 5°F to 12°F under typical summer conditions. Some premium systems pair the blower with a Peltier thermoelectric cooler to actively chill the airflow rather than simply circulate it.
Types of Ventilated Seat Buttons and Control Architectures
Not all ventilated seat buttons are built the same. The control interface varies by vehicle platform, model year, and trim level.
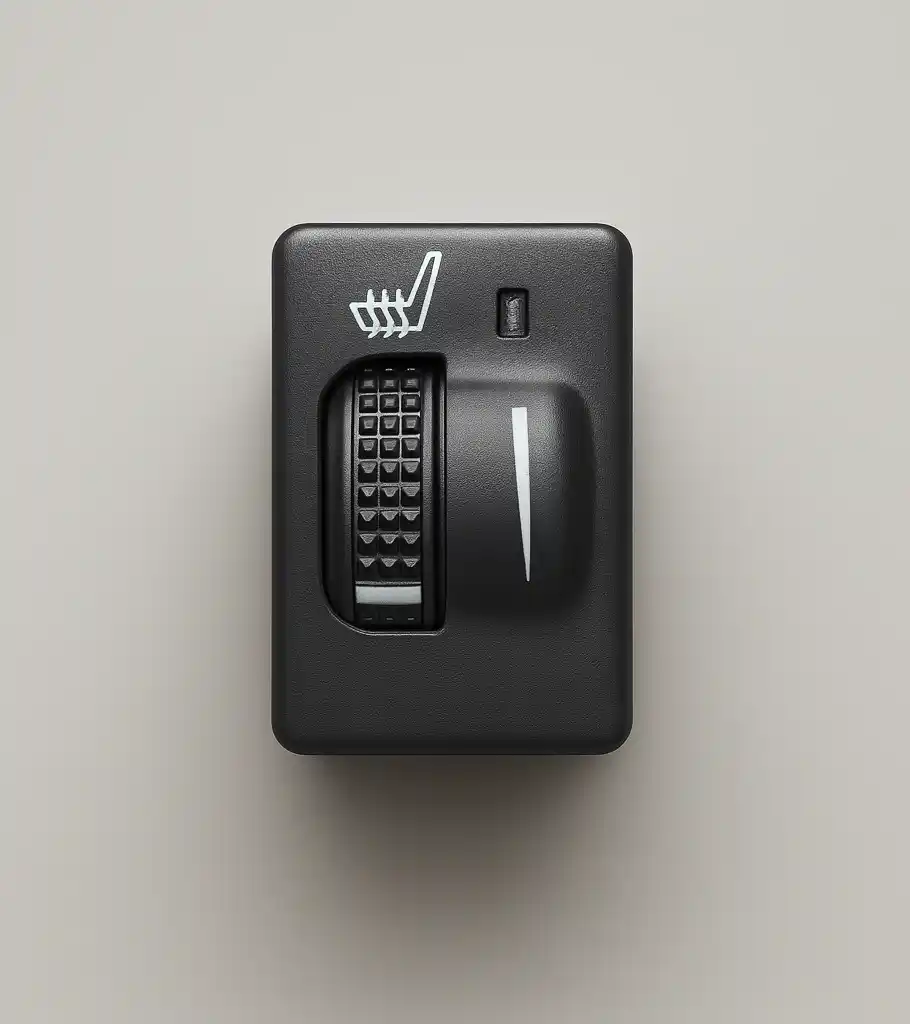
- Discrete push-button switches: The most common OEM style. A single rocker or momentary-contact button cycles through Off, Low, Medium, and High. The button houses an integrated LED ring or icon backlight that changes intensity at each speed step.
- Shared HVAC panel controls: On vehicles where seat ventilation is deeply integrated into the climate system—certain GM and Ford platforms—the ventilated seats button appears as a soft-key on the touchscreen HVAC display rather than a physical switch.
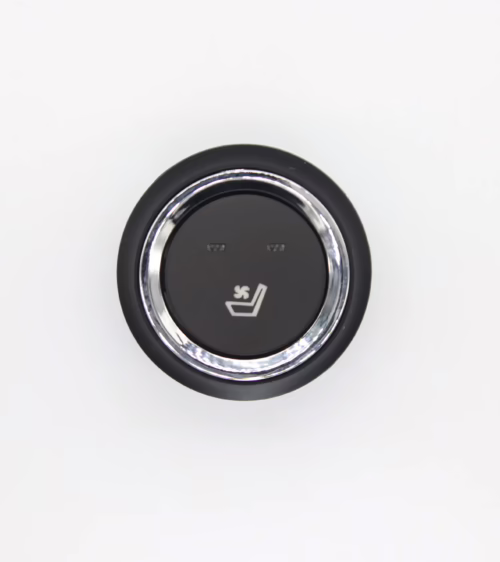
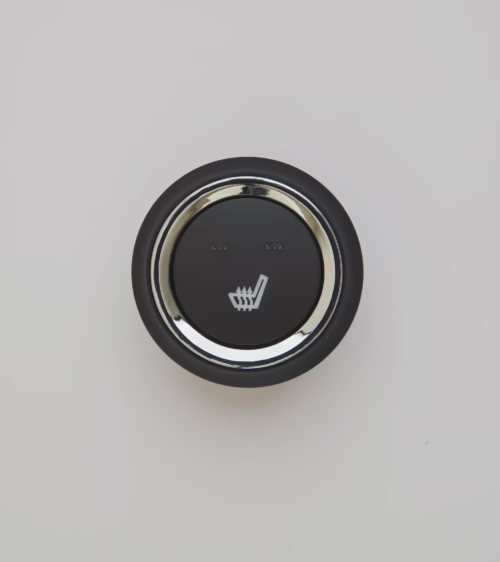
- Rotary dial controls: Found on some European OEMs. A center-press dial lets the driver select fan speed with tactile detents, reducing eyes-off-road time during adjustment.
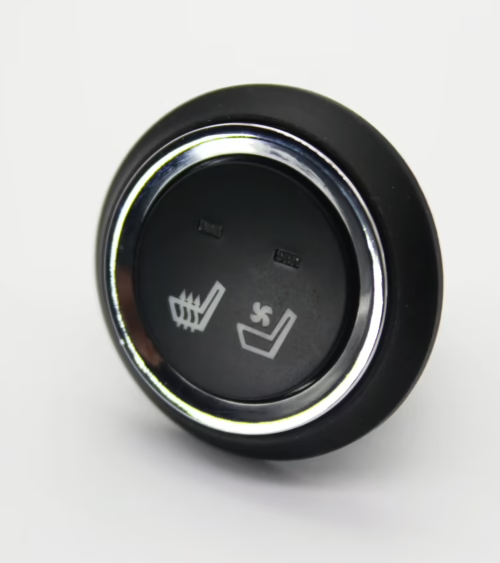
- Combination heated and ventilated switches: A single switch body manages both functions. Pressing up or right activates heating; pressing down or left activates ventilation; pressing toward center turns the active function off. These are common on Toyota, Lexus, and Hyundai applications.
- Aftermarket standalone controllers: When adding a ventilation kit to a vehicle without factory ventilation, an aftermarket three-speed rocker or PWM dial provides the same control logic at lower cost without requiring BCM integration.
Understanding which architecture your seat uses matters because replacement switches are not interchangeable between platforms even when they look visually similar.
Decoding Ventilated Seat Button Icons and Indicators
The icon printed or backlit on a ventilated seats button follows a loose industry convention, but there is no single universal standard. Here is what the most common symbols mean.
- Seat silhouette with upward arrows: The baseline icon for seat ventilation. Arrows pointing away from the seat surface indicate airflow being pushed outward through the perforations.
- Seat silhouette with a snowflake: Indicates active cooling—usually a Peltier-assisted system that chills the air before delivery, not just fan circulation.
- Fan blade symbol alongside a seat: Blower-only ventilation with no active cooling element. Common on mid-range trims where the system moves ambient cabin air rather than conditioned air.
- Horizontal bars (1, 2, 3): Speed level indicators. One bar lit equals Low, two equals Medium, three equals High. Some systems use a segmented arc instead of stacked bars.
- Amber glow vs. blue glow: On combination switches, amber backlighting indicates heating is active and blue backlighting indicates ventilation is active. This dual-color LED logic is wired into the switch PCB or controlled by the BCM.
If your vehicle displays a fault icon—typically a flashing seat symbol accompanied by a warning tone—it usually means the blower motor has stalled, the in-seat thermistor has failed, or the control module has lost CAN-bus communication with the BCM.
Body diagnostic trouble codes in the B1xxx range apply in these situations.
How to Operate the Ventilated Seats Button Effectively
Getting the most out of seat ventilation requires more than pressing the button and leaving it on High. A few operational habits extend blower motor life and maximize occupant comfort.
- Pre-cool before occupancy: If your vehicle supports remote start with climate control, activate seat ventilation two to three minutes before entering. The seat surface temperature drops significantly before you sit down, rather than fighting accumulated body heat from the first moment of contact.
- Start on Low, adjust upward: Beginning at Low speed reduces motor inrush current and noise. If Low speed is comfortable after five minutes, running High unnecessarily accelerates brush and bearing wear.
- Combine with AC airflow: Seat ventilation works primarily by evaporation. Cabin humidity matters. Running the vehicle AC lowers relative humidity inside the cabin, making the ventilated seat system considerably more effective. In high-humidity conditions the blower moves moisture away from your back but cannot evaporate it as efficiently.
- Do not block the seat perforations: Seat covers, sheepskin pads, or thick cushion inserts placed over perforated leather defeat the system entirely. Airflow resistance rises sharply and blower motor operating temperature increases as a result.
- Turn off when not needed: Unlike seat heaters, which shut off automatically on most platforms via in-seat temperature sensors, some ventilation systems run indefinitely until manually switched off. Leaving ventilation active in cold weather provides no comfort benefit and places unnecessary load on the electrical system.
Common Ventilated Seat Button Problems and How to Diagnose Them
When the ventilated seats button stops responding or behaves erratically, the fault is rarely the switch itself. Work through the following diagnostic sequence before replacing any component.
- Button press with no response: Check the relevant fuse, typically labeled Seat Ventilation or Seat Comfort in the fuse box diagram. A blown fuse means something downstream drew excess current. Inspect the blower motor for mechanical seizure before replacing the fuse and moving on.
- Fan runs at only one speed regardless of button position:
- The speed-selection logic lives in either the switch PCB or a dedicated seat control module. Probe the output wires at the switch connector with the ignition on. If the switch sends correct PWM signals but the blower ignores them
- replace the blower control module. If switch outputs are incorrect across all positions
- the switch PCB has failed.
- Intermittent operation tied to temperature: Cold-solder joints on the switch PCB are common on vehicles stored in extreme cold. Gently flex the switch housing while the seat is running. If the system cuts in and out, the PCB has a hairline crack internally.
- Switch illuminated but no airflow: The LED circuit and the blower circuit are wired independently on most platforms. The switch may be powered and illuminated while the blower relay has failed or its ground circuit is open. Test the blower motor directly with 12V before condemning the switch assembly.
- Grinding or high-pitched noise from the seat:
- Foreign debris—coins
- crumbs
- hair—can enter the blower inlet. Remove the seat bottom panel and inspect the inlet screen. A worn blower bearing produces a steady whine that increases linearly with fan speed
- distinguishing it from debris rattling at a fixed frequency.
OEM vs. Aftermarket Ventilated Seat Button Replacements
When a factory ventilated seat button fails, three sourcing options exist, each with different trade-offs in cost, availability, and fit.
- OEM dealer part: Guaranteed fit, correct backlight color, and plug-and-play installation. Typically the most expensive route—$80 to $200 for the switch assembly on common platforms—and may require a dealer programming step on CAN-bus integrated systems.
- OEM-equivalent aftermarket: Produced to OEM specification by tier-1 suppliers, often sold under brands such as Standard Motor Products or Dorman. Usually 30 to 50 percent less expensive than dealer pricing, with the same connector and no programming required on most applications.
- Universal aftermarket controller: Appropriate only when the original switch is unavailable or when adding ventilation to a vehicle that did not originally have it. Requires a custom wiring harness adaptation and does not integrate with the BCM or touchscreen display.
For OEM seat manufacturers integrating ventilation into new programs, specifying the switch alongside the blower motor and seat control module from a single supplier simplifies validation testing and reduces tolerance-stack risk at harness connectors.
Adding a Ventilated Seats Button to a Vehicle Without Factory Ventilation
Retrofitting a seat ventilation system requires four primary components:
- a perforated or re-trimmed seat cover
- a distribution layer of open-cell foam or rigid ducting
- a brushless blower motor mounted to the seat frame
- a switch to control it. The ventilated seats button in a retrofit application is typically wired to a switched 12V source on the ignition circuit
- with the output terminal driving a relay or controlling the blower motor directly through a PWM speed controller.
Key wiring considerations when installing the switch in a retrofit application:
- Protect the circuit with a 10A inline fuse between the switched 12V source and the switch input terminal.
- Route low-voltage control wiring away from high-current motor wiring to prevent electromagnetic noise pickup that can cause erratic speed behavior.
- Choose a switch mounting location that does not fall within airbag deployment zones in the door panel or seat bolster. Center console mounting between the front seats is typically the safest option on most platforms.
- Label the switch clearly if it does not carry a standard icon. Occupants unfamiliar with the system may otherwise activate it in cold weather and mistake the draft for an HVAC leak.
Complete seat ventilation kits that include the cover, foam distribution layer, blower motor, and switch significantly reduce installation complexity compared to sourcing each component independently.
Verify that the kit’s blower CFM rating matches the seat cover’s perforation density before purchasing—under-powered blowers on high-perforation covers produce little perceptible airflow at the skin surface.
Frequently Asked Questions
Why does my ventilated seats button light up but no air comes out?
The switch LED and blower motor run on separate circuits. When the indicator lights but the fan does not spin, check the blower motor fuse and relay first. If both are intact, apply 12V directly to the blower motor leads at the seat connector.
If the fan spins under direct power, the problem is in the control module or relay circuit, not the blower. If the motor does not spin under direct power, the blower has seized or the winding has burned out and the motor needs replacement.
Can I leave the ventilated seats button running continuously?
Running the system throughout a drive is fine—OEM blower motors are rated for duty cycles well above typical use patterns. However, leaving it on while the vehicle is parked and the ignition is off will draw from the battery.
Most vehicles shut off seat ventilation automatically when the ignition is turned off. Verify the behavior specific to your platform in the owner’s manual before assuming either way.
Can heated seats and ventilated seats run at the same time from a shared switch?
Many OEM combination switches manage both functions from a single control body, but the heating element and blower motor circuits are electrically independent. Running both simultaneously is not harmful under normal conditions.
However, on platforms with limited seat circuit amperage—typically 15A shared between both functions—the seat control module may reduce one function’s output to stay within the circuit’s rated current rather than allowing either to run at full intensity simultaneously.
Lucky Driver Inc. supplies seat ventilation blower motors, PWM speed controllers, and ventilated seat switch assemblies compatible with a wide range of OEM and aftermarket seat platforms.
Whether you are a seat manufacturer specifying components for a new seating program or a shop retrofitting ventilation into a customer’s vehicle, Lucky Driver’s engineering team can match the right blower motor, distribution layer, and switch assembly to your specific application. Contact Lucky Driver Inc.
to request datasheets, evaluation samples, or volume pricing on ventilated seat system components.
Our seat heater switches in stock covers rocker, rotary, and round designs.
Related Articles
- Toyota Heated Seat Switch: Diagnosis, Replacement, and Upgrades
- Lucky Driver Seat Heater Products: 2024 Updates and New SKUs
- Seat Ventilation System: How It Works and How to Add One in 4 Steps
- Add Heated Seats to Car: 5-Step Aftermarket Installation Guide
- Heated Seat Switch Types: Rocker, Rotary, and Push-Button — 3 Options Compared
Frequently Asked Questions About ventilated seats button
Procurement engineers evaluating ventilated seats button for OEM programs regularly ask the following questions. Answers cover specification, compatibility, certification, and sourcing for ventilated seats button requirements.
What voltage ratings are available for ventilated seats button?
Standard ventilated seats button configurations support 12 V DC for passenger vehicles and 24 V DC for commercial trucks. Selecting the correct ventilated seats button voltage at the design stage eliminates harness rework later. Lucky Driver maintains ventilated seats button inventory in both ratings for same-week shipment.
Which certifications apply to ventilated seats button production?
ventilated seats button assemblies entering OEM programs typically require UL recognition, REACH compliance, and RoHS documentation. Lucky Driver holds certification records for every ventilated seats button variant and includes copies with sample and production shipments.
How is watt density specified for ventilated seats button?
Watt density for ventilated seats button is expressed in W/cm² and ranges from 0.04 to 0.12 depending on heat-up time requirements. Lower watt density ventilated seats button designs improve element longevity, while higher values suit cold-climate applications.
Lucky Driver engineering reviews ventilated seats button requirements and recommends watt density based on your seat platform.
What connector families are used with ventilated seats button?
ventilated seats button harnesses are available with Molex, TE Connectivity, and Delphi connector families. Matching the ventilated seats button connector to the vehicle harness reduces assembly time and eliminates adapter cables. Specify your harness format when requesting a ventilated seats button quote from Lucky Driver.
What is the lead time for ventilated seats button samples?
ventilated seats button samples from Lucky Driver’s North American warehouse ship within 3 to 5 business days for standard configurations. Custom ventilated seats button variants with modified pad geometry or connector pinouts require 4 to 6 weeks. Contact Lucky Driver to confirm ventilated seats button availability before submitting your engineering schedule.
For reported issues related to seat ventilation systems across vehicle models, the NHTSA vehicle safety database provides recall and complaint records by make and model.