If the seat heat in your Honda CR-V has stopped working or the switch button no longer illuminates, a faulty Honda CR-V seat heater switch is the most common starting point for diagnosis.
This 2026 guide covers how the CR-V seat heating circuit is designed, how to confirm whether the switch is actually the failed component, and how to replace it correctly across all major CR-V generations—so you order the right part the first time.
How the Honda CR-V Seat Heating System Works
The CR-V seat heating system centers on a resistive heating element—a carbon-fiber or nichrome wire mat laminated beneath the seat cover fabric. Wired in series with the mat is a negative temperature coefficient (NTC) thermistor, a temperature-sensitive resistor whose resistance drops as the seat surface warms.
The body control module (BCM) or a dedicated seat heater control module reads this resistance value continuously to regulate heat output and prevent the mat from exceeding safe operating temperature.
When you press the seat heater switch, it sends a low-voltage logic signal to the control module—it does not carry the full heating-element current. The module then closes an internal relay to deliver battery voltage directly to the heating mat. This relay-controlled architecture matters for diagnosis:
- because the switch only carries a signal current of roughly 20–50 mA
- its internal contacts oxidize and degrade far faster than the heating element itself
- which sustains 6–8 A of continuous load current during warm-up.
Most CR-V seat heater switches also integrate an LED indicator that illuminates in one or two stages to reflect the selected heat level. This LED is powered from a separate low-current tap on the switch connector.
A dead indicator light therefore does not automatically mean the heating mat has burned out—it far more often signals that the switch circuit itself has an open contact or a degraded connection at the connector housing.
CR-V Seat Heater Switch Differences Across 4 Generations
Honda revised the seat heater switch design significantly with each major CR-V generation. Ordering by generation is essential because connector housings, pinouts, and signal logic are not interchangeable across model years.
- First and Second Gen (1997–2006): Factory-installed heated seats were not available on these models. Aftermarket retrofits typically use universal push-button switches wired directly into the seat harness, bypassing the BCM entirely.
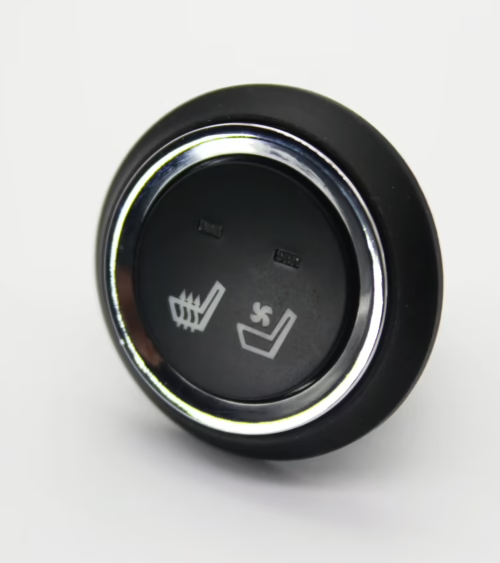
- Third Gen (2007–2011): Heated seats appeared as an EX-L option. The switch is a mechanical rocker unit with a four-pin connector and a two-stage LED indicator mounted in the center console—low glow for low heat, full brightness for high heat.
- Fourth Gen (2012–2016): The connector was revised to a six-pin housing and the switch bezel attachment changed. Third-gen and fourth-gen units will not cross-fit without a wiring adapter; the pinout sequence is different even where the physical plug appears similar.
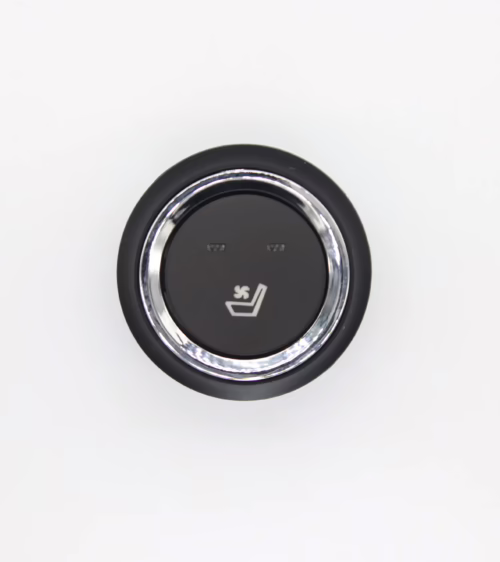
- Fifth Gen (2017–2022): Higher trims moved to capacitive touch switches. These fail differently from mechanical rockers—they are more sensitive to moisture intrusion and require the BCM to relearn a capacitive baseline after replacement.
- Some units require a specific ignition-cycle calibration procedure described in the Honda service manual before full function is restored.
- Sixth Gen (2023–present): The HVAC touchscreen handles seat heating control on most trims, but physical rocker switches remain on Sport and EX-L. Physical switch removal follows fourth-gen procedures with updated trim-panel clip placement.
5 Symptoms That Point to a Failing Seat Heater Switch
These failure patterns are most often traced back to the switch rather than the heating mat or wiring harness. Recognizing them early reduces diagnostic time significantly.
- Switch LED does not illuminate: The indicator LED is powered independently of the mat circuit. A dead LED accompanied by no heat output is a strong indicator of switch failure or an open in the switch power feed—not a burned-out heating element.
- Only one heat level works: Two-stage switches use two independent internal contacts. Oxidation on one contact eliminates low or high heat while leaving the other stage functional.
- Switch requires multiple presses to activate: Progressive contact wear increases resistance on the signal line until the BCM can no longer reliably detect the input. The symptom worsens gradually over weeks or months.
- Seat heater shuts off prematurely: A corroded switch contact can introduce noise on the thermistor feedback line, causing the BCM to interpret the seat as overheating and cut the relay output earlier than intended.
- No defects found in the mat or harness: If you measure the heating mat resistance and find it within specification—typically 2–5 Ω for a full seat depending on generation—and find no broken wires in the harness, the switch becomes the primary suspect by systematic elimination.
Diagnostic Checklist Before You Order a Replacement Switch
A structured check before purchasing prevents replacing a serviceable switch when the actual fault is upstream in the fuse circuit or downstream in the harness.
- Verify the fuse:
- The seat heater circuit is protected by a dedicated fuse
- typically labeled HTD SEAT in the driver’s-side under-dash fuse box. A blown fuse disables all seat heating regardless of switch condition. Replace only with the amperage specified on the fuse-box cover—typically 15 A or 20 A depending on generation.
- Measure voltage at the switch connector: With the ignition in the Run position, backprobe the switch power-feed pin using a digital multimeter set to DC voltage. You should read system voltage (12.0–14.4 V). No voltage indicates an upstream fault in the wiring or fuse block, not a switch defect.
- Test the switch output signal: Press the switch while monitoring the signal wire. A functional switch should toggle the signal pin between ground (0 V) and the reference level—5 V on BCM-controlled fifth- and sixth-gen models, 12 V on direct-relay third- and fourth-gen models.
- Inspect the connector terminals: Moisture accumulates inside center consoles over time. Green or white deposits on the connector pins elevate contact resistance and produce symptoms identical to switch failure. Clean terminals with electrical contact cleaner and retest before condemning the switch itself.
- Scan for body diagnostic trouble codes: On fifth- and sixth-gen CR-Vs, use an OBD-II scanner that supports Honda body codes. Codes in the B17xx range identify whether the fault is in the switch input circuit or the heating element output circuit, reducing diagnostic time from hours to minutes.
Step-by-Step: How to Replace the Honda CR-V Seat Heater Switch
The procedure below applies to third- and fourth-generation CR-Vs. Fifth-gen capacitive touch switches follow the same basic sequence, but the unit is secured with foam tape rather than plastic clips, and BCM calibration is required after installation.
- Step 1 – Disconnect the battery negative terminal: Wait two full minutes before touching any electrical connector. This clears BCM volatile memory and prevents inadvertent fault codes in airbag-adjacent circuits routed through the center console area.
- Step 2 – Remove the center console trim panel: The switch bezel is retained by plastic snap clips on third- and fourth-gen models. Insert a plastic trim removal tool at the panel edge and work around the perimeter. Avoid metal tools against painted surfaces to prevent visible cosmetic damage.
- Step 3 – Unplug the wiring connector: Press the locking tab on the connector housing inward and pull the connector straight back. Do not twist or lever the housing—the locking tab is brittle on assemblies that are more than ten years old.
- Step 4 – Release the switch from the bezel: Squeeze the two side retention tabs simultaneously and push the switch body forward through the bezel opening. On fifth-gen capacitive units, work a plastic spudger around the full perimeter to break the foam tape bond gradually and avoid cracking the bezel.
- Step 5 – Install the replacement switch: Seat the new switch into the bezel until both side tabs click audibly. Reconnect the wiring harness connector until the locking tab engages with a distinct click.
- Step 6 – Restore power and verify operation: Reconnect the battery negative terminal, start the engine, and test both heat stages. Confirm the LED indicator illuminates at the correct brightness for each stage and that the seat begins warming within 60 seconds of activation.
OEM vs. Aftermarket Honda CR-V Seat Heater Switches
Honda OEM switches meet the original electrical specification precisely and fit without adapter work, but dealer pricing typically runs $60–$120 per switch.
Quality aftermarket units use equivalent contact materials and identical connector standards at a lower cost, provided you verify the part number against your exact CR-V trim and model year before purchasing.
When evaluating an aftermarket switch, confirm a continuous current rating of at least 10 A at 12 V DC—the mat can draw close to 8 A during the initial heat-up phase.
Also check for an operating temperature range of −40 °C to +85 °C and an IP54 or better ingress protection rating on the connector housing.
Signal voltage compatibility is equally critical: a switch designed for a 5 V BCM input will generate fault codes or fail entirely if installed in a generation that expects a 12 V logic signal.
For confirmed-fit options, you can browse replacement seat heater switches verified against Honda CR-V connector pinouts and current ratings by generation—eliminating compatibility guesswork before you commit to a part.
Frequently Asked Questions
Q: My CR-V seat heater worked this morning but stopped this afternoon. Is that the switch?
Intermittent, heat-dependent failures are a hallmark of oxidized switch contacts that lose conductivity as metal expands at operating temperature. Run the voltage test from the diagnostic checklist above while the fault is active to catch the drop in real time.
If system voltage is present at the switch connector but the signal pin stays at 0 V during button presses, the switch is the fault.
Q: Can I replace just the switch without disturbing the seat heater assembly?
In the vast majority of cases, yes. The switch, heating mat, thermistor, and wiring harness are separate, independently replaceable components.
Only consider replacing the mat if you measure resistance across the mat terminals and find an open circuit or a reading outside the 2–5 Ω range specified for your generation—that result means the mat wire is broken, not the switch.
Q: Does replacing the seat heater switch require dealer reprogramming on newer CR-V models?
On third- and fourth-gen CR-Vs, no programming is required—the switch is a passive input device with no stored parameters. On fifth- and sixth-gen models with capacitive touch switches, the BCM must relearn the capacitive input baseline after installation.
This is a straightforward ignition-cycle procedure documented in the Honda service manual, not a dealer-only reflash, and typically takes under five minutes to complete.
Get the Right Switch for Your CR-V
Lucky Driver Inc. supplies seat heater switches, heating element kits, and control modules to automotive repair shops and individual owners across North America. If you are ready to order, browse our complete seat heating product lineup to find the correct replacement for your CR-V’s generation and trim level.
Our technical team is available to confirm fitment and signal voltage compatibility before you buy, so you receive a part that works correctly the first time.
Related Articles
- Honda Accord Heated Seat Switch: 2026 Repair Guide
- Honda Civic Seat Heater Switch: 2026 Repair Guide
- Toyota Tundra Heated Seat Switch: 2026 Repair Guide
- Toyota 4Runner Seat Heater Switch: 2026 Repair Guide
- Toyota Corolla Heated Seats: 2026 Complete Owner’s Guide
Frequently Asked Questions About honda crv seat heater switch
Procurement engineers evaluating honda crv seat heater switch for OEM programs regularly ask the following questions. Answers cover specification, compatibility, certification, and sourcing for honda crv seat heater switch requirements.
What voltage ratings are available for honda crv seat heater switch?
Standard honda crv seat heater switch configurations support 12 V DC for passenger vehicles and 24 V DC for commercial trucks. Selecting the correct honda crv seat heater switch voltage at the design stage eliminates harness rework later.
Lucky Driver maintains honda crv seat heater switch inventory in both ratings for same-week shipment.
Which certifications apply to honda crv seat heater switch production?
honda crv seat heater switch assemblies entering OEM programs typically require UL recognition, REACH compliance, and RoHS documentation. Lucky Driver holds certification records for every honda crv seat heater switch variant and includes copies with sample and production shipments.
How is watt density specified for honda crv seat heater switch?
Watt density for honda crv seat heater switch is expressed in W/cm² and ranges from 0.04 to 0.12 depending on heat-up time requirements. Lower watt density honda crv seat heater switch designs improve element longevity, while higher values suit cold-climate applications.
Lucky Driver engineering reviews honda crv seat heater switch requirements and recommends watt density based on your seat platform.
What connector families are used with honda crv seat heater switch?
honda crv seat heater switch harnesses are available with Molex, TE Connectivity, and Delphi connector families. Matching the honda crv seat heater switch connector to the vehicle harness reduces assembly time and eliminates adapter cables.
Specify your harness format when requesting a honda crv seat heater switch quote from Lucky Driver.
What is the lead time for honda crv seat heater switch samples?
honda crv seat heater switch samples from Lucky Driver’s North American warehouse ship within 3 to 5 business days for standard configurations. Custom honda crv seat heater switch variants with modified pad geometry or connector pinouts require 4 to 6 weeks.
Contact Lucky Driver to confirm honda crv seat heater switch availability before submitting your engineering schedule.